How To Test Electrical Wires: A Comprehensive Guide For Beginners
So, you’ve decided to dive into the world of electrical wiring, huh? That’s pretty cool if you ask me. Testing electrical wires is one of those skills that can save you a lot of time, money, and headaches. Whether you’re fixing a faulty light switch or troubleshooting a bigger issue, knowing how to test electrical wires is essential. And guess what? You don’t need to be a professional electrician to get started.
But let’s face it, working with electricity can be intimidating, especially for beginners. There are wires everywhere, confusing symbols, and the constant fear of getting zapped. Don’t worry, though! This guide is here to make things simple, safe, and straightforward. By the end of this article, you’ll feel confident enough to test electrical wires like a pro.
Now, before we dive into the nitty-gritty details, let’s talk about why testing electrical wires matters. It’s not just about curiosity—it’s about safety. Whether you’re installing new wiring or troubleshooting an existing issue, testing ensures everything is working as it should. Plus, it helps you avoid costly mistakes down the road. So, buckle up, and let’s get started!
Why Testing Electrical Wires is Important
Alright, let’s break it down. Testing electrical wires isn’t just some random activity—it’s a crucial step in ensuring your electrical systems are safe and functional. Think about it: electrical faults can lead to power outages, damaged appliances, or even worse—fires. By testing wires, you’re essentially giving your system a health check-up. It’s like going to the doctor for a routine check-up, except instead of your body, it’s your home’s wiring.
Here’s the kicker: testing electrical wires isn’t just for professionals. As a homeowner or DIY enthusiast, you can perform basic tests to identify issues before they escalate. For instance, you might notice flickering lights or a circuit breaker that keeps tripping. These are red flags that something’s amiss, and testing the wires can help you pinpoint the problem.
Common Electrical Issues That Require Testing
Let’s talk about some common electrical issues that might prompt you to test your wires:
- Flickering or dimming lights
- Frequent circuit breaker trips
- Dead outlets or switches
- Burning smell or sparks from outlets
- Unexplained power outages
These issues might seem minor at first, but they can quickly turn into major problems if left unchecked. Testing your wires can help you catch these issues early, saving you time and money in the long run.
Tools You’ll Need to Test Electrical Wires
Before you start testing electrical wires, you’ll need the right tools. Don’t worry; you don’t need a whole toolbox full of fancy gadgets. Just a few essential items will do the trick. Here’s what you’ll need:
- Multimeter: This is your go-to tool for testing electrical wires. It measures voltage, current, and resistance.
- Voltage tester: A simple tool that checks for the presence of voltage in wires or outlets.
- Insulated gloves: Safety first! These gloves protect you from electric shocks while working with live wires.
- Screwdrivers: You’ll need these to open up outlets, switches, or junction boxes.
- Wire strippers: If you need to expose the copper wire inside the insulation, wire strippers are a must.
Pro tip: Invest in high-quality tools. Cheap tools might break easily or give inaccurate readings, which defeats the purpose of testing in the first place.
Step-by-Step Guide to Testing Electrical Wires
Now that you’ve got your tools ready, let’s walk through the process of testing electrical wires. Follow these steps carefully to ensure safety and accuracy:
Step 1: Turn Off the Power
Always, always, always turn off the power before working with electrical wires. This is a non-negotiable rule. Head to your circuit breaker panel and shut off the power to the area you’re working on. Trust me, you don’t want to risk getting shocked while testing wires.
Step 2: Double-Check for Power
Even after turning off the power, it’s a good idea to double-check. Use a voltage tester to ensure there’s no electricity flowing through the wires. If the tester lights up or beeps, that means there’s still power, and you need to investigate further.
Step 3: Set Up Your Multimeter
Your multimeter is the star of the show here. Set it to the appropriate setting for the test you’re performing. For instance, if you’re checking voltage, set it to the voltage range. If you’re checking continuity, switch it to the continuity setting.
Step 4: Test the Wires
Now it’s time to test the wires. Here’s how:
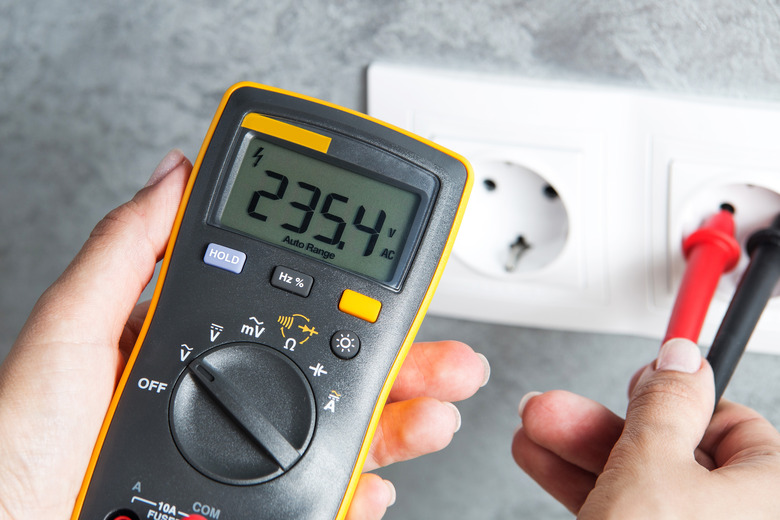
- For voltage testing: Touch the multimeter probes to the terminals of the wire. The multimeter will display the voltage reading.
- For continuity testing: Touch the probes to the ends of the wire. If the wire is intact, the multimeter will beep or show a reading close to zero.
Remember to take your time and double-check your readings. Accuracy is key when testing electrical wires.
Troubleshooting Common Issues
So, you’ve tested your wires, and something seems off. What do you do now? Here are some common issues and how to troubleshoot them:
Issue 1: No Voltage Reading
If your multimeter shows no voltage, it could mean one of two things: either the circuit is off, or there’s a break in the wire. Double-check that the circuit breaker is on and try testing again. If the issue persists, inspect the wire for any visible damage or breaks.
Issue 2: High Resistance
If your multimeter shows high resistance, it could indicate a poor connection or a damaged wire. Check the connections at both ends of the wire and ensure they’re secure. If the wire itself is damaged, you might need to replace it.
Issue 3: Inconsistent Readings
Inconsistent readings can be frustrating, but they’re usually caused by loose connections or faulty testing equipment. Make sure your multimeter is calibrated and functioning properly. Also, tighten any loose connections and try testing again.
Safety Tips for Testing Electrical Wires
Safety should always be your top priority when working with electricity. Here are some tips to keep you safe while testing electrical wires:
- Wear insulated gloves and shoes to protect yourself from electric shocks.
- Never work on live wires unless absolutely necessary, and only if you’re qualified to do so.
- Use tools with insulated handles to minimize the risk of shocks.
- Keep one hand in your pocket while testing to prevent current from traveling through your chest.
- Have a fire extinguisher nearby in case of emergencies.
Remember, safety isn’t just about protecting yourself—it’s about protecting your family and property too. Take the necessary precautions and don’t hesitate to call a professional if you’re unsure about anything.
Understanding Electrical Wiring Basics
To truly master testing electrical wires, it helps to understand the basics of electrical wiring. Here’s a quick rundown:
Types of Electrical Wires
Not all wires are created equal. Here are the most common types you’ll encounter:
- Hot wires: These carry electrical current from the power source to the device. They’re usually black or red.
- Neutral wires: These complete the circuit by carrying current back to the power source. They’re usually white.
- Ground wires: These provide a safe path for electricity to travel in case of a fault. They’re usually bare copper or green.
Wire Gauges and Ampacity
Wire gauges refer to the thickness of the wire, and ampacity refers to the amount of current a wire can safely carry. Thicker wires can handle more current, so it’s important to use the right gauge for your application. For example, 14-gauge wire is suitable for 15-amp circuits, while 12-gauge wire is better for 20-amp circuits.
Advanced Techniques for Testing Electrical Wires
Once you’ve mastered the basics, you can move on to more advanced techniques. Here are a few:
Testing Ground Faults
Ground faults occur when electricity takes an unintended path to the ground. To test for ground faults, use a ground fault circuit interrupter (GFCI) tester. Simply plug it into the outlet and press the test button. If the outlet’s breaker trips, it’s functioning properly.
Testing Insulation Resistance
Insulation resistance testing checks the integrity of the wire’s insulation. Use a megohmmeter for this test. Higher resistance readings indicate better insulation, while lower readings might mean the insulation is damaged.
When to Call a Professional
As much as we love DIY projects, there are times when it’s best to leave things to the professionals. Here are a few situations where you should call an electrician:
- Dealing with high-voltage lines
- Working with complex electrical systems
- Identifying the source of recurring electrical issues
- Installing new wiring or upgrading your electrical panel
Remember, it’s always better to err on the side of caution. If you’re unsure about anything, don’t hesitate to call in a professional. Your safety is worth it!
Conclusion
Testing electrical wires might seem daunting at first, but with the right tools and knowledge, it’s a skill anyone can master. By following the steps outlined in this guide, you’ll be able to safely and effectively test your wires like a pro. Remember to prioritize safety, double-check your readings, and don’t hesitate to seek help when needed.
So, what are you waiting for? Grab your multimeter, put on those insulated gloves, and get to work. And don’t forget to share this article with your friends who might find it helpful. Together, let’s make our homes safer and more efficient—one wire at a time!
Table of Contents:
- Why Testing Electrical Wires is Important
- Tools You’ll Need to Test Electrical Wires
- Step-by-Step Guide to Testing Electrical Wires
- Troubleshooting Common Issues
- Safety Tips for Testing Electrical Wires
- Understanding Electrical Wiring Basics
- Advanced Techniques for Testing Electrical Wires
- When to Call a Professional
Julie Hagerty: The Iconic Actress Of Classic Comedy
The Iconic Portrayal Of Lois Lane By Teri Hatcher: A Lasting Legacy
Discover The Vibrant Campus Life At College Of Staten Island

Electrical Installation Testing Procedures PDF Electrical Wiring
How to Test Electrical Wires Hunker

Electrical Wiring Mastery for Beginners A Comprehensive Guide to
