How To Test Electrical Wires: A Comprehensive Guide For Beginners
So listen up, folks, because we’re diving deep into the world of electrical wires and how to test them properly. If you’re a beginner, don’t sweat it; this guide is tailor-made for you. Testing electrical wires might sound like a daunting task, but with the right tools and knowledge, it’s totally doable. Stick around, and by the end of this, you’ll be a mini-electrician ready to tackle any wiring challenge that comes your way.
Here’s the deal: knowing how to test electrical wires isn’t just about fixing stuff; it’s about safety. A single mistake could lead to a short circuit, fire hazard, or even worse—electrocution. But hey, don’t freak out. With this comprehensive guide, you’ll learn step-by-step how to test electrical wires safely and effectively. Let’s get started, shall we?
This article is packed with tips, tricks, and expert advice to help you master the art of testing electrical wires. Whether you’re replacing old wiring, troubleshooting an issue, or simply curious about how things work, this guide has got your back. So grab your tools, put on your thinking cap, and let’s dive in!
Table of Contents:
- Why Test Electrical Wires?
- Tools You Need to Test Electrical Wires
- Safety First: Preparing for the Test
- Step-by-Step Guide to Testing Electrical Wires
- Common Issues and How to Fix Them
- Advanced Techniques for Testing Wires
- Troubleshooting Tips for Beginners
- Cost Considerations and Budgeting
- Frequently Asked Questions
- Conclusion: Final Thoughts
Why Test Electrical Wires?
Alright, let’s talk turkey here. Testing electrical wires isn’t just something you do for fun—it’s essential. Electrical wires are the lifelines of your home or workplace. They carry power to all your devices, appliances, and lighting systems. But over time, these wires can degrade, get damaged, or develop faults. And when that happens, it’s not just annoying—it’s dangerous.
Think about it: a faulty wire can cause a power outage, ruin your expensive electronics, or even start a fire. That’s why regular testing is crucial. By testing electrical wires, you can identify potential problems early and fix them before they escalate into bigger issues. Plus, it’s a great way to ensure everything’s running smoothly and efficiently.
Key Benefits of Testing Electrical Wires
Here’s a quick rundown of why you should bother testing electrical wires:
- Safety: Detect and eliminate hazards like short circuits or exposed wires.
- Efficiency: Ensure your wiring is functioning at its best, reducing energy waste.
- Preventive Maintenance: Catch issues early before they cause costly repairs.
- Peace of Mind: Knowing your wiring is safe and reliable is priceless.
Tools You Need to Test Electrical Wires
Before you dive into testing electrical wires, you’ll need the right tools. No, you don’t need to go out and buy an entire toolbox (unless you want to). Here’s a list of essential tools that’ll make your life a whole lot easier:
- Multimeter: This is your go-to tool for testing voltage, current, and resistance in wires.
- Circuit Tester: A simple device that helps you check if a circuit is live.
- Insulation Tester: Perfect for checking the condition of wire insulation.
- Wire Strippers: You’ll need these to strip the outer casing of wires without damaging the conductor.
- Protective Gear: Gloves, goggles, and insulated tools are a must for safety.
Pro tip: invest in quality tools. Cheap tools might save you a few bucks upfront, but they can be unreliable and unsafe in the long run. Trust me, you don’t want to skimp on safety when dealing with electricity.
Safety First: Preparing for the Test
Let’s face it—working with electricity can be risky. But with the right precautions, you can minimize the risks and stay safe. Here’s what you need to do before you start testing electrical wires:
Turn Off the Power
This one’s a no-brainer, but it’s worth repeating: always turn off the power before you start working on any electrical wires. You don’t want to end up as a human conductor, do you? Double-check that the power is off by using a circuit tester or multimeter.
Use Protective Gear
Wear insulated gloves and safety goggles to protect yourself from accidental shocks or sparks. It might feel a bit overkill, but trust me, it’s better to be safe than sorry.
Work in a Dry Environment
Water and electricity don’t mix. Make sure your workspace is dry and free from moisture. If you’re working outdoors, check the weather forecast and avoid working in the rain.
Step-by-Step Guide to Testing Electrical Wires
Now that you’re all geared up, let’s dive into the nitty-gritty of testing electrical wires. Follow these steps carefully, and you’ll be a pro in no time.
Step 1: Inspect the Wires Visually
Before you break out the fancy tools, take a good look at the wires. Check for any visible signs of damage, like frayed insulation, exposed conductors, or burn marks. If you spot anything suspicious, mark it for further inspection.
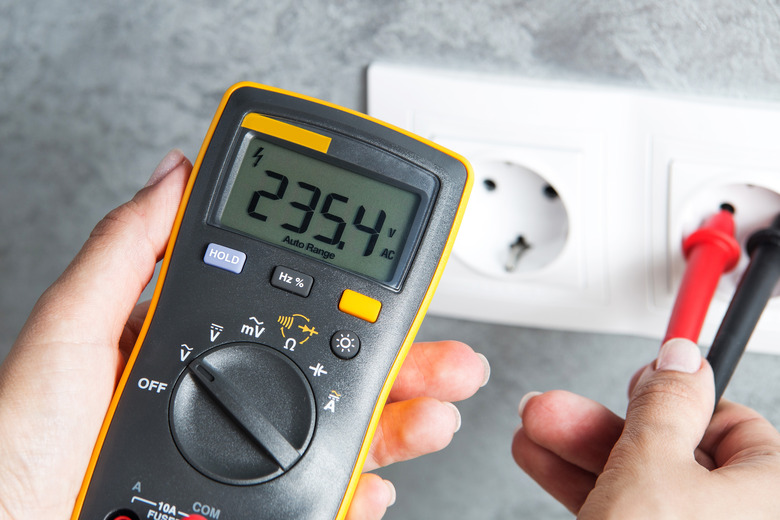
Step 2: Test for Voltage
Use your multimeter to test for voltage in the wires. Set the multimeter to the appropriate voltage range and touch the probes to the wire terminals. If the display shows a reading, it means the wire is live. If it shows zero, the wire is safe to work on.
Step 3: Check Continuity
Continuity testing ensures that the wire is intact and not broken anywhere. Set your multimeter to the continuity mode and touch the probes to the ends of the wire. If you hear a beep, it means the wire is continuous and good to go.
Step 4: Inspect Insulation
Use an insulation tester to check the condition of the wire insulation. This is especially important for older wires that might have degraded over time. If the insulation is compromised, it’s time to replace the wire.
Common Issues and How to Fix Them
Even with careful testing, you might encounter some common issues with electrical wires. Here’s how to identify and fix them:
Issue 1: Short Circuit
A short circuit occurs when the hot wire comes into contact with the neutral or ground wire. This can cause sparks, tripped breakers, or even a fire. To fix it, locate the point of contact and separate the wires. Use electrical tape to insulate the exposed parts.
Issue 2: Open Circuit
An open circuit happens when there’s a break in the wire, preventing electricity from flowing. This can cause devices to stop working. To fix it, locate the break and repair the wire using a wire connector or soldering iron.
Issue 3: Overloaded Circuit
Too many devices connected to a single circuit can overload it, causing it to trip or overheat. To fix it, redistribute the load by unplugging unnecessary devices or installing additional circuits.
Advanced Techniques for Testing Wires
Once you’ve mastered the basics, you can move on to some advanced techniques for testing electrical wires. These methods require more skill and experience, but they can help you diagnose complex issues.
Thermal Imaging
Thermal imaging cameras can detect hot spots in wires, indicating potential issues like overheating or poor connections. This is especially useful for troubleshooting hard-to-reach areas.
Frequency Analysis
Using a frequency analyzer, you can check the quality of the electrical signal in the wires. This is helpful for identifying noise or interference that might affect sensitive electronics.
Troubleshooting Tips for Beginners
Testing electrical wires can sometimes feel like solving a puzzle. Here are some tips to help you troubleshoot common issues:
- Start with the basics: check the power source and connections.
- Use a systematic approach: test one component at a time to isolate the issue.
- Keep a log: document your findings to avoid repeating tests.
- Consult the manual: if you’re unsure about something, refer to the device’s manual or seek professional advice.
Cost Considerations and Budgeting
Testing electrical wires doesn’t have to break the bank. With a few basic tools and some know-how, you can save a lot of money on professional repairs. However, there are a few costs to consider:
- Tools: Invest in quality tools that will last you a long time.
- Repairs: If you find major issues, you might need to replace wires or call in a professional.
- Time: Testing wires can be time-consuming, so factor that into your budget.
Frequently Asked Questions
Q: Can I test electrical wires without turning off the power?
A: Absolutely not! Always turn off the power before testing electrical wires to avoid the risk of electrocution.
Q: How often should I test my electrical wires?
A: It’s a good idea to test your wires at least once a year, especially if you live in an older home or use a lot of electrical devices.
Q: Can I do this myself, or should I hire a professional?
A: If you’re comfortable with basic electrical work and have the right tools, you can definitely test your wires yourself. However, for more complex issues, it’s always best to consult a professional.
Conclusion: Final Thoughts
And there you have it, folks—a comprehensive guide to testing electrical wires for beginners. By following the steps and tips outlined in this article, you’ll be well-equipped to handle any wiring challenges that come your way. Remember, safety always comes first, so take the necessary precautions and don’t hesitate to seek professional help if needed.
Now it’s your turn. Have you tried testing electrical wires before? Share your experiences in the comments below. And if you found this guide helpful, don’t forget to share it with your friends and family. Let’s spread the knowledge and make the world a safer, more electrified place—one wire at a time!
Discover The Best Movie Experience At AMC Conyers Crossing 16: A Complete Guide
Border Collie And Corgi Mix: The Ultimate Guide To This Unique Hybrid Breed
Sarah Jakes Roberts Age: A Comprehensive Look At The Life And Legacy Of A Modern-Day Trailblazer

Electrical Installation Testing Procedures PDF Electrical Wiring
How to Test Electrical Wires Hunker

Electrical Wiring Mastery for Beginners A Comprehensive Guide to
